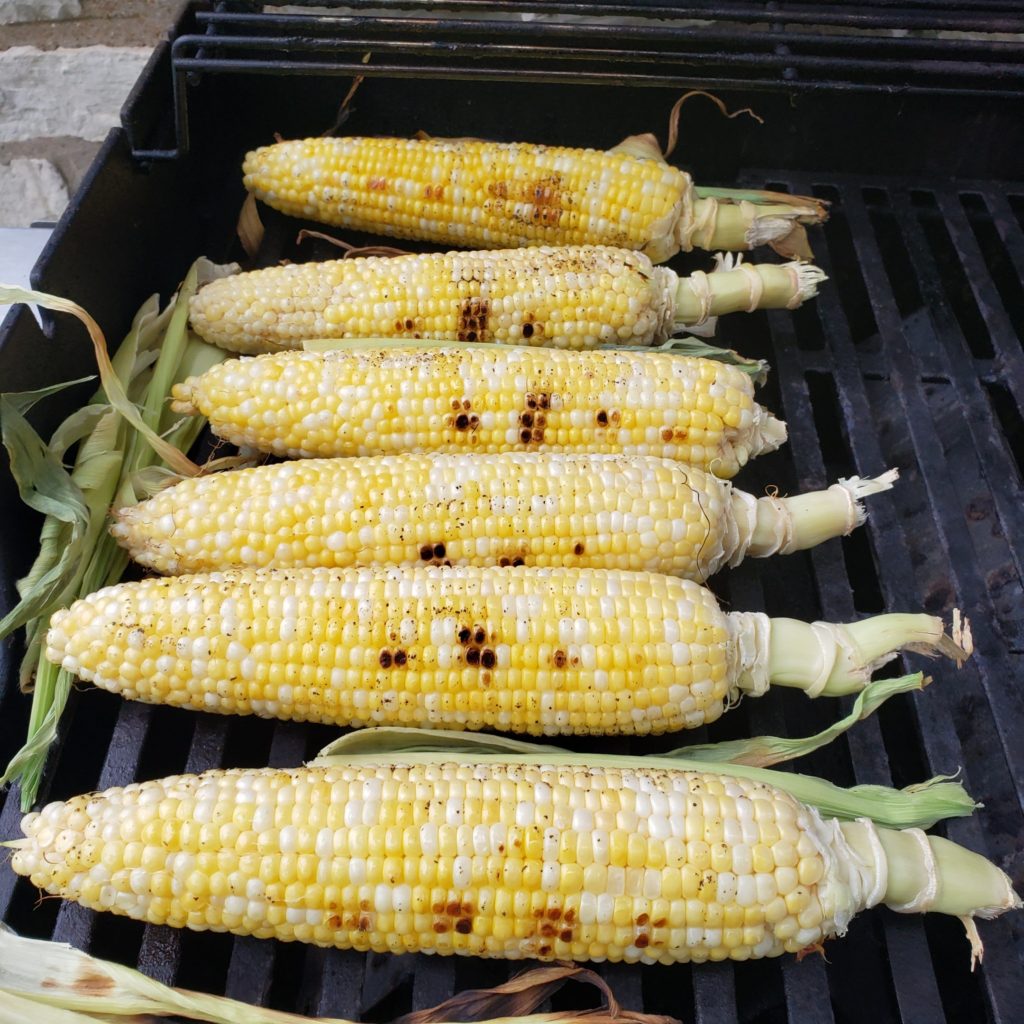
Grilled corn on the cob is a summertime favorite at our house. Tastes like summer and it is cooked outside, what’s more to love than that? Sometimes, however, I need a simple method to get it done. While the Mexican Street Corn we made last year is spectacular, sometimes I want a simpler flavor. This recipe delivers the goods while keeping it simpler, allowing you to focus on other dishes you’re probably making at the same time.
As an Amazon Associate I earn from qualifying purchases.
Why I Love This Recipe?
Simple, easy, straightforward, and fast. Inspired by Roy Choi’s Mexican Street Corn (Elote), the corn is peeled and then grilled. Grilling corn in the husk takes a long time, but if you peel them first, they take about as long as it takes to boil corn. The salty buttery flavor is off the chart, think carnival roasted corn. It’s downright delicious and simple enough for the kids to help in earnest.
Ingredients & Equipment
Two Ingredients for Grilled Corn on the Cob
- Sweet Corn on the Cob: Picking quality corn on the cob is essential to getting this right. It’s hard to tell when corn is good because it’s still in the husk. Look for these signs of quality to make sure you are getting nice ears of corn, most of the time:
- Hefty. Pick up the ear, and “weigh” it in your hand. Is it heavier or lighter than it looks? Go for corn that is heavier than it looks like it should be. This works for most produce and corn as well.
- Green Husks. The husks should look fresh and supple, not dried. You’re looking for the color of spring grass, not August “I need water” grass.
- Yellow Silks. Yellow silks are also an indicator that the corn is fresh. Avoid corn that has black silks.
- Salted Butter: The other ingredient that makes this corn so dang delicious. Corn and butter go hand in hand like peanut butter and jelly. Salted butter is added twice in this recipe and it both cooks the salt onto the corn and keeps the corn from burning. It works so well and the salted goodness is spectacular.
“This is the best damn corn I have ever had!”
Karl Kloster- 2021
Equipment for Grilled Corn
- Grill: You are here to cook amazing corn an outdoor grill, so this is probably obvious. I suggest a Weber Grill for all things grilling, since they make a quality product with replaceable parts. Either charcoal or gas, we are using a very hot gas grill in this recipe. That is why this recipe is great to follow up a meat recipe you just seared in the hot zone.
- Grilling Tongs: A pair of tongs long enough to flip the corn without burning your hand. I suggest a metal pair of grilling tongs, but your indoor cooking tongs will work in a pinch.
- Aluminum Foil: In case you miss the timing and the corn finishes before the rest of the food. Tent it in foil to keep it warm before you sit down to eat.
Preparing Grilled Corn on the Cob
Preparing the Corn
- Peel the corn out of the husks. However you get it done, remove the husks and most of the silks, but try to leave the stalk at the end. The stalk makes a nice handle, but it isn’t essential. You don’t have to be too picky about the silks, most of them will burn off during cooking.
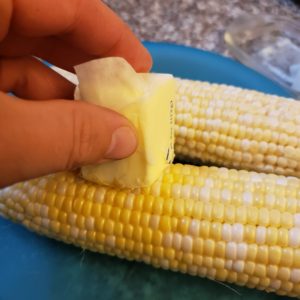
- Butter the corn. Take a room temperature stick of salted butter and rub it all over each corn on the cob. It should go on nice and thick, so be generous. This is a great task for a kid!

Cooking the Corn on the Grill
- Heat your grill to its highest setting. Place the corn over the high heat.
- Cook each side of the corn for 3-5 minutes, depending on the heat of your grill. You want some charred kernels without any blackened and shriveled. The butter you applied will help with keeping it from outright burning.
- Rotate a 1/4 turn every time until the whole ear is cooked. Remove from heat.
- Once again, rub the stick of butter all over each ear until totally covered. Tent with foil until ready to serve.
Secret Tip for Extra Flavor
For those of you who read the whole article instead of skipping to the recipe, here is a secret to add a layer of flavor to the grilled. Save some of the husks and toss them on the grill with the corn on the cob. The husks release a huge amount of smokey flavor as they char, unique to corn husks, and that flavor sticks to the butter on the corn. Think of that smell you come across at State Fairs and Carnivals. Try it and leave a review below with the results!
You can also use the husks to cook meat on, like in our Husk Fish Recipe!

Two Ingredient Grilled Corn on the Cob
Equipment
- Grill (Charcoal or Gas)
- Grilling Tongs
- Aluminum Foil
Ingredients
- 6 ears Corn on the Cob Husk, silks removed
- 1 stick Salted Butter
Instructions
- Shuck the corn to remove the husks and most of the silks. Leave any stalk on the end if possible.
- Rub butter heavily over each ear of corn.
- Preheat the grill for 5 minutes. Place the corn on the grill over high heat, and do not close the grill. Roast the corn for 3-5 minutes on each side, rotating it a 1/4 turn each time.
- Once the corn is roasted on all sides, remove from heat. Rub butter all over each ear once again. Tent with foil until serving.
Notes
- This recipe is happily vegetarian and gluten-free.
- This recipe can be made in the oven using a broiler. Keep a close eye on the corn as it can overcook rather quickly this way.
Nutrition
Frequently Asked Questions
Grilling can remove the moisture from the corn while it cooks, leaving you with shriveled or deflated kernels. Since the husk is removed, soaking the corn is not necessary for this recipe. Instead we cover it in butter. The fat in the butter cooks the corn faster than the moisture can escape, leaving you with delicious, plumb kernels.
If the husk is off, you want to grill corn over high heat. That way the kernels cook and slightly char before they overcook. The charred kernels give it a lovely, smokey flavor which is delicious.
Corn Husks are the outer layer of leaves wrapped around the ear of corn while it’s on the plant. The leaves help protect the corn from pests and disease, as well retain moisture. The husks can be used dry or fresh in different food preparations, such as tamales.
For the sake of space saving, I will cut leftover corn off the cob and save it in an airtight leftover container. The corn will keep for up to a week like this, and is great to eat by itself or as an ingredient in another recipe.
Ideally, corn on the cob can be stored in the fridge with the husk on, until the day it is to be prepared. This keep the kernels from drying out. Corn in the husk can be left out on the counter out of direct sunlight for 3-5 days before cooking it.
It is always a guessing game when buying corn in the husk, but here are some tips for picking the best corn on the cob:
Hefty. Pick up the ear, and “weigh” it in your hand. Is it heavier or lighter than it looks? Go for corn that is heavier than it looks like it should be. This works for most produce and corn as well.
Green Husks. The husks should look fresh and supple, not dried. You’re looking for the color of spring grass, not August “I need water” grass.
Yellow Silks. Yellow silks are also an indicator that the corn is fresh. Avoid corn that has black silks.
Support DFTF!
If you like this recipe and what we’re doing here, these are a few ways to support our food adventures:
- Make the recipe and rate it in the comments section. Tell us what you thought about it and show us that someone out there is reading these!
- Purchases made through our affiliate links pay us a small commission at no charge to you. Show your support by shopping through our links.
- Share it on Facebook, IG, or Pinterest and tag #dadfeedsthefam to tell us how it went. Every mention is a tiny billboard for what we’re doing here!
.